Quality Hub Test Operations
The main goal of Test Operations is to ensure that software is released with high quality by executing effective and efficient tests throughout the development process. This includes functional testing, performance testing, security testing, regression testing, integration testing, and user acceptance testing.
Test Operations also involve maintaining test environments, managing test data, and providing test environment support for development teams and other stakeholders. Test Operations teams collaborate closely with various teams such as Development, Quality Assurance (QA), DevOps, and Project Management to ensure that testing is integrated seamlessly into the software development process and that testing activities are executed consistently, reliably, and efficiently.
Effective Test Operations help organizations minimize the risks of releasing software that doesn’t meet its intended quality standards. By continuously monitoring and improving testing processes, organizations can reduce the number of defects, improve time-to-market, and ultimately deliver high-quality software products that meet customer expectations and requirements.
Quality Hub’s Test Operations module lets teams manage environments, version control systems, and repositories and orchestrate test plan executions.
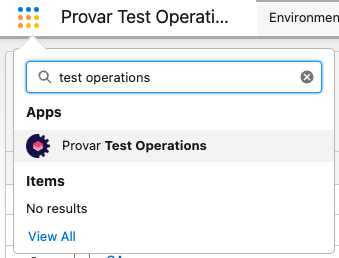
You can open the Test Operations app from the App drawer in Salesforce:
Test Environment Setup
Environments in Quality Hub are used to identify groups of systems with a common level of production-ready features. For example, depending on their development process, teams may want to define their environments as Production, User Acceptance Testing, QA, System Integration Testing, and Development.
To define a new environment, open the Environments tab and click the New button.
Within an environment record, you can define systems of various types.
Salesforce System Setup
Quality Hub lets you set up connections to Salesforce orgs in case you want to run Apex unit tests and retrieve the results and the code coverage reports.
Follow these steps to set up a connection to Salesforce:
- Open the System record of System Type equal to Salesforce.
- You will find the Salesforce Connection Assistant card on the right-hand side of the page.
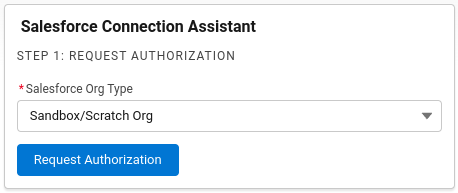
- Select the right Org Type and click Request Authorization.
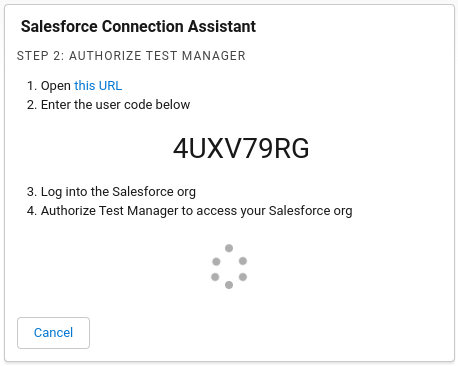
- Follow the instructions on the screen:
- Open the link, enter the user code, and click Connect.
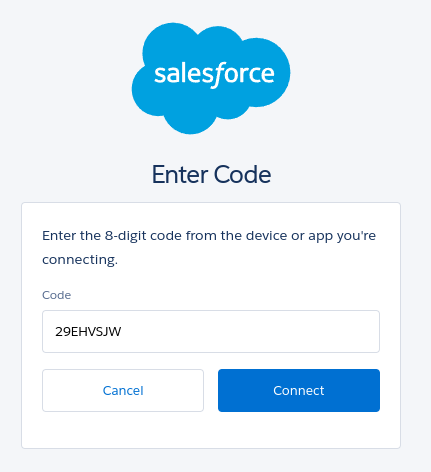
- Log into the Salesforce org and click Allow.
- Then click Continue.
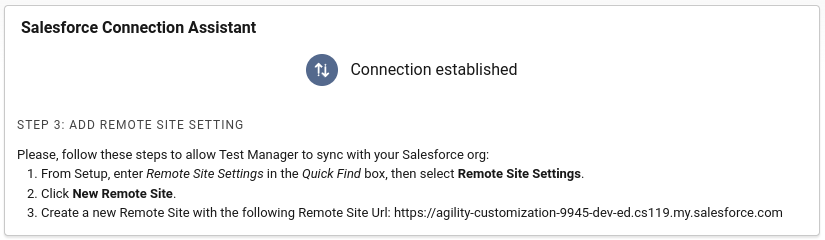
- Once you have authorized Quality Hub to access the Salesforce org, the Salesforce Connection Assistant will automatically refresh to indicate that the connection has been established.
- If you have not set up Quality Hub’s metadata connection (see Setup section of this document), follow the final steps in the assistant to manually add the Remote Site Setting, allowing Quality Hub to communicate with the other Salesforce org.
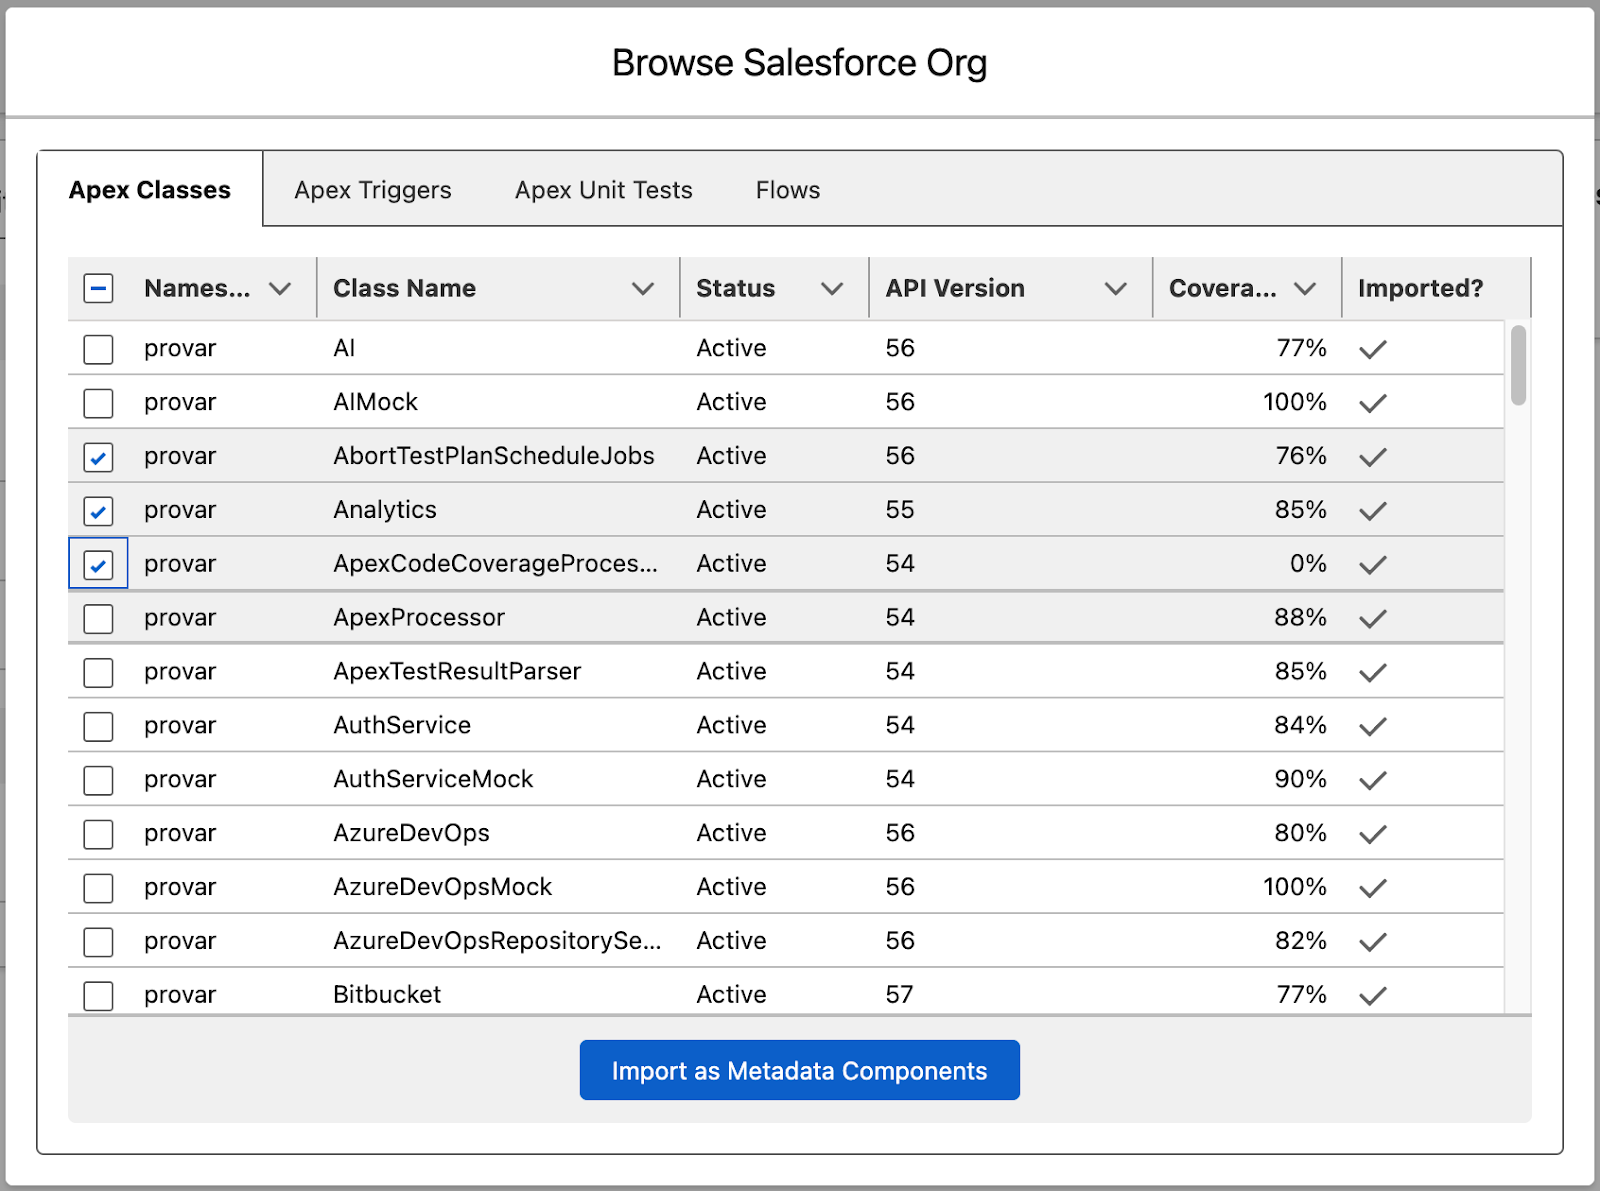
Org Browser
Salesforce system records let you browse the connected orgs to retrieve their Apex Classes, Apex Triggers, or Flows as Metadata Components (to be used for metadata coverage reporting and smart testing) or import the Apex Unit Tests as Test Cases (for test execution and metadata coverage reporting).
To browse the Salesforce org and import its information, follow these steps:
- Click the Browse Org button on a connected Salesforce system record page.
- Click the corresponding button (e.g., Browse Apex Classes) to load the list of metadata items in the org.
- Select the metadata items you want to import. You can see if they have been imported in the Imported column.
- Click Import as Metadata Components or Import as Test Cases to import the metadata items.
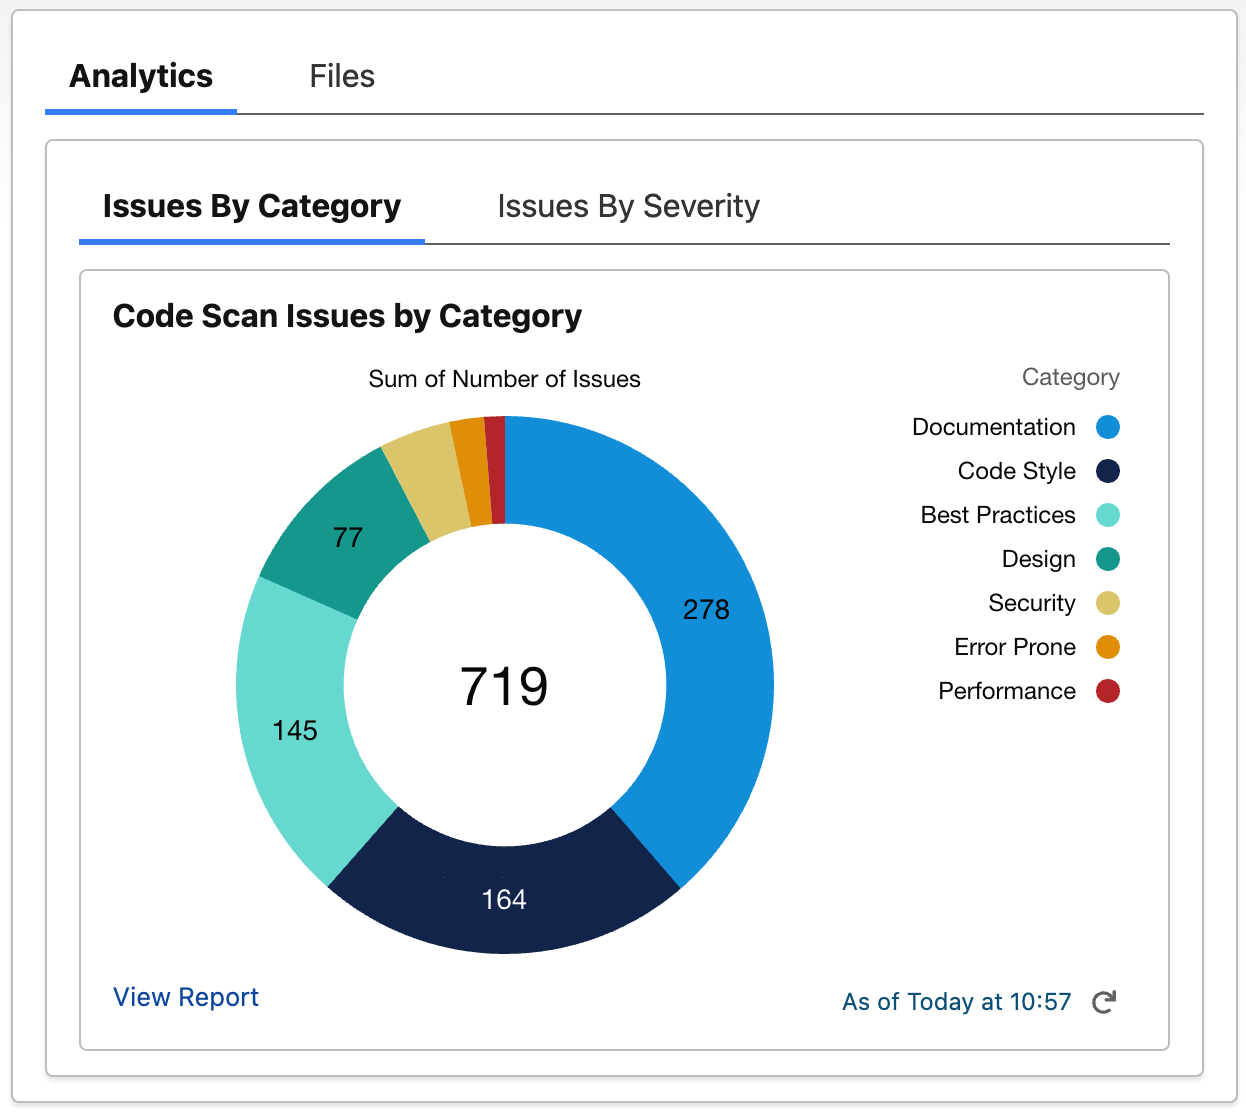
Code Quality Scans
Quality Hub provides two ways of tracking code quality scans:
Use a plugin to connect to 3rd-party code quality scanning tools like Clayton or QualityClouds and import their results on a scheduled basis.
Manually importing code quality results.
To manually import the results of a static code analysis performed with tools like PMD or Salesforce Code Analyzer, follow these steps:
- Go to a Salesforce system record.
- In its Code Quality section, click the New button on the Code Scans related list.
- Enter a scan date and time.
- Set the status as Draft.
- Click the Save button.
- Open the newly created Code Scan record.
- In its Files section, upload the code scan results. The file must be in SARIF format with the .sarif extension (e.g., myscan.sarif).
- Change the Code Scan status to Ready and save the changes.
- Quality Hub will start processing the file immediately, changing the status to In Progress and then to Completed or Failed once the file has been processed.
- Refresh the page after a few seconds to see the results.
Code Coverage Reports
Code coverage can be used to understand how much of the code is being tested, but it doesn’t measure how thorough or adequate those tests are.
Still, it can help your team progress toward a more thorough test suite, highlighting trouble spots requiring more attention (e.g., new code introduced but not covered or coverage % dropping after a deployment).
Quality Hub can monitor Salesforce Apex code coverage across multiple orgs. Follow the below instructions to set it up.
- Go to a System record and type Salesforce or create a new one.
- Ensure Provar Manager is connected to the Salesforce org (see Test Environment Setup > Salesforce System Setup).
- Click on the Coverage tab.
To schedule coverage reports to run regularly, create a Coverage Report Schedule record from the System record page (see above instructions).
Once the Coverage Report Schedule Status is set to Active, Quality Hub will regularly create a Coverage Report record under the selected System per the schedule settings.
API System Setup
With Provar Manager, you can define a System record of type API to represent an external API you may want to call at some point.
When setting up this type of System, it’s essential to specify the following:
- API Endpoint
- Authentication Type
- No Authentication
- Basic Authentication, which requires the fields Username and Password to be filled.
Set the Password to NULL if you want it to be empty. - Named Credential (recommended) requires the field Named Credential to be filled with the name of a Salesforce Named Credential.
Named Credentials allow you to authenticate using Username/Password, OAuth 2.0, JWT, JWT Token Exchange, and AWS Signature Version 4.
Salesforce documentation on how to define a Named Credential.
- API Paths
Note: remember to add the API Endpoint URL to the Salesforce Remote Site Settings if you’re not using the Named Credential authentication type.
As an example, if you wanted to define an API System that represents the OpenWeatherMap API, you would follow these steps:
- Create a system record of type API
- Set the API Endpoint to https://api.openweathermap.org/data/2.5
- Set the Version to 2.5
- Set the Authentication Type to No Authentication.
- Create an API Path record for the Current Weather Data API:
- Set the Path to “/weather”
- Set the Summary to “Current weather data”
- Set the HTTP Method to “GET”
- Set the Content-Type to “application/json”