Provar Jenkins Plugin
The prototype will help the user create an extensible, configurable plugin in Jenkins, allowing users to quickly set up Jenkins jobs without having to perform all of the necessary software installations.
The plugin is already available on Jenkins Marketplace. It adds the capability to install Chrome/browsers based on user input. Also, it provides the capability to add a parameter for the Test Folder name to the build step.
Note: The use of Provar Labs prototypes is at your own risk. Provar Labs prototypes should only be used on your non-production instance to test their functionality if you accept the risk of doing so. These prototypes have not completed the beta testing phase and might pose a higher-than-normal risk for bugs. We may enhance, withdraw, or replace prototype features based on extended testing and feedback gathered. Do not rely on these features as part of your test automation.
Steps for Jenkins Plugin
Step 1: Download the Jenkins version 2.361.4 (available on 28/11/2022)
Select Windows from Download Jenkins
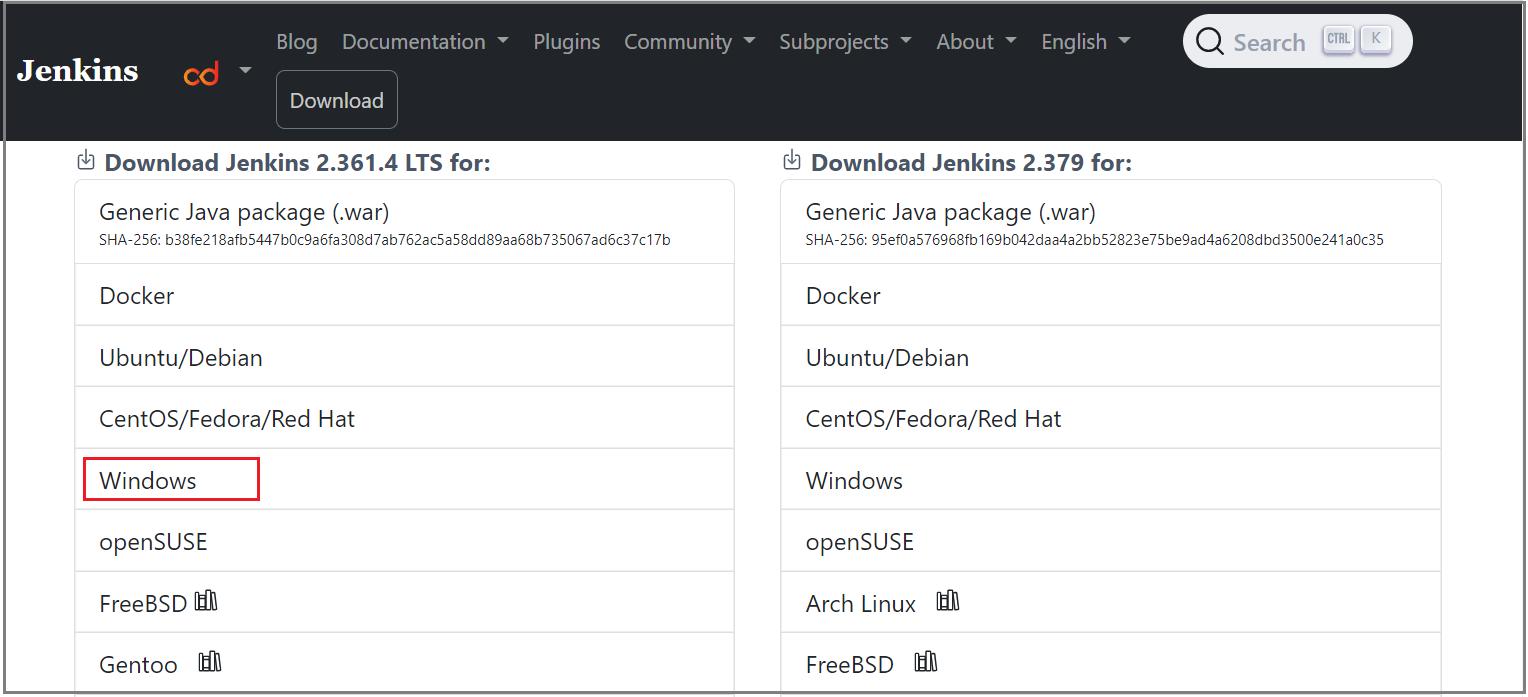
Above: Snapshot of Download of Jenkins version.
Step 2: Login into Jenkins.
On your Jenkins login URL. Enter Username and Password.

Above: Snapshot of the login screen of Jenkins
Step 3: Jenkins dashboard
Click Manage Jenkins (on the left side) to check if the connection is successful.

Above: Snapshot of the Jenkins dashboard.
Step 4: Manage the Plugin from the Dashboard.
To manage the Jenkins plugin, use Plugin Manager. This section will be available only for admins for the Jenkins installation.

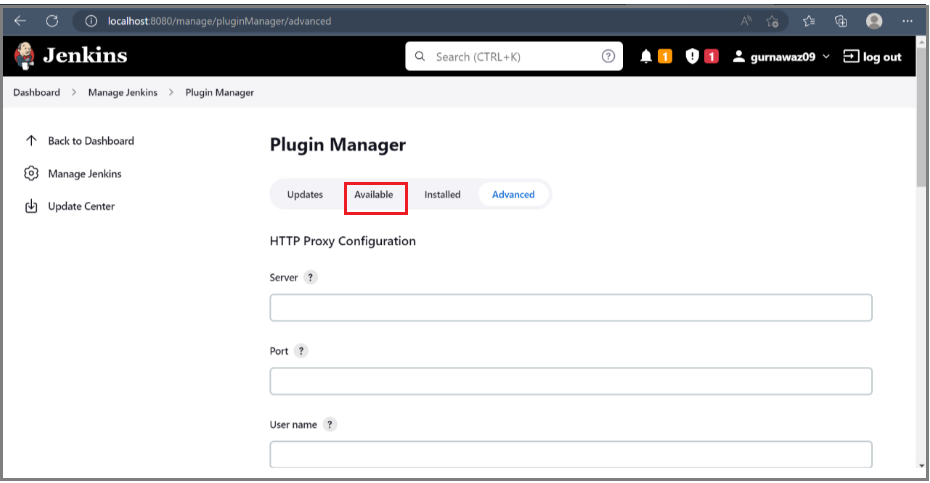
Above: Under Plugin Manager go to the Available Section.
Step 5: Provar Automation CLI
The installer file will be updated to reflect any new publicly available versions of the Provar Automation CLI. The latest will always point to the latest Provar Automation CLI version publicly available.

Above: Snapshot of Provar Automation CLI.
Step 6: Configuration
1. You can configure an automatic installer using an extract configuration.
- If you do not have the ability to replace files on your Jenkins instance, then this method is preferred.
- All installer links are available at the Installer Link
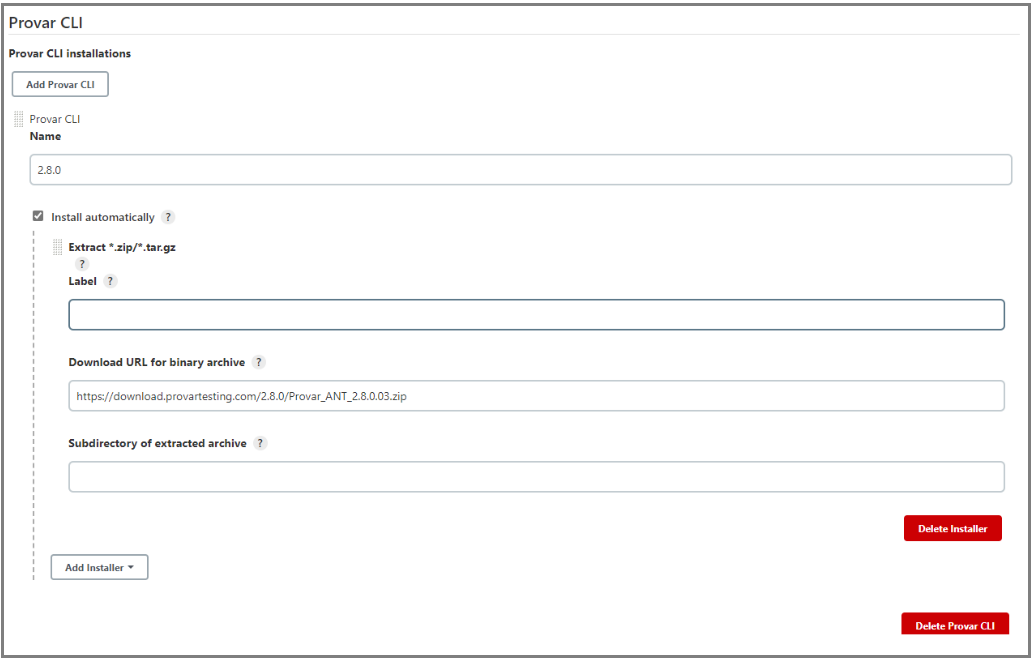
Above: Snapshot of installer.
2. Manual Installation
You can configure the plugin to use an existing installation of either the Provar Automation CLI or full Provar Automation.
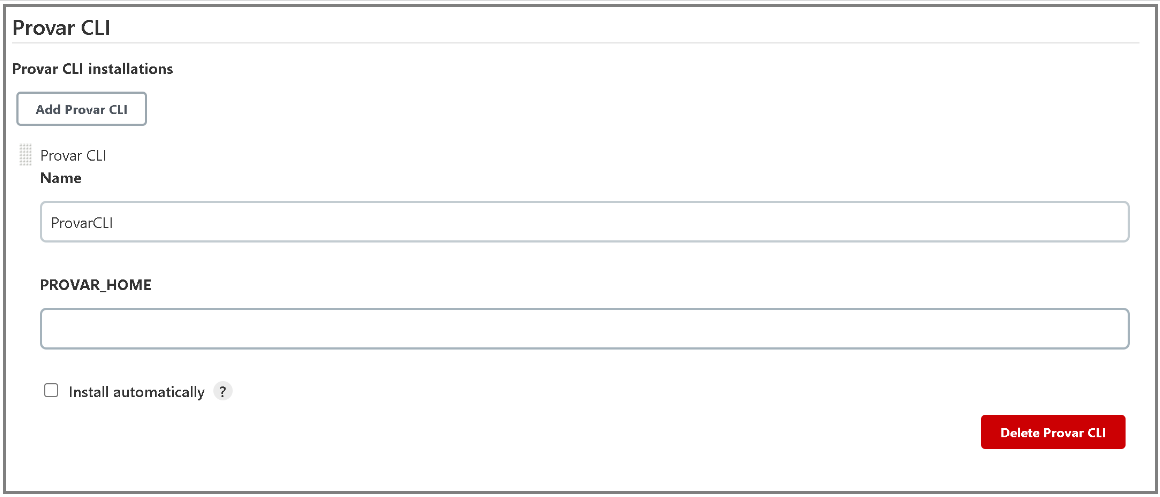
Above: Snapshot of Manual Installation.
3. JDK Configuration.
Requires Oracle Account to install JDK automatically. Oracle JDK plugin GitHub Oracle JDK Plugin GitHub
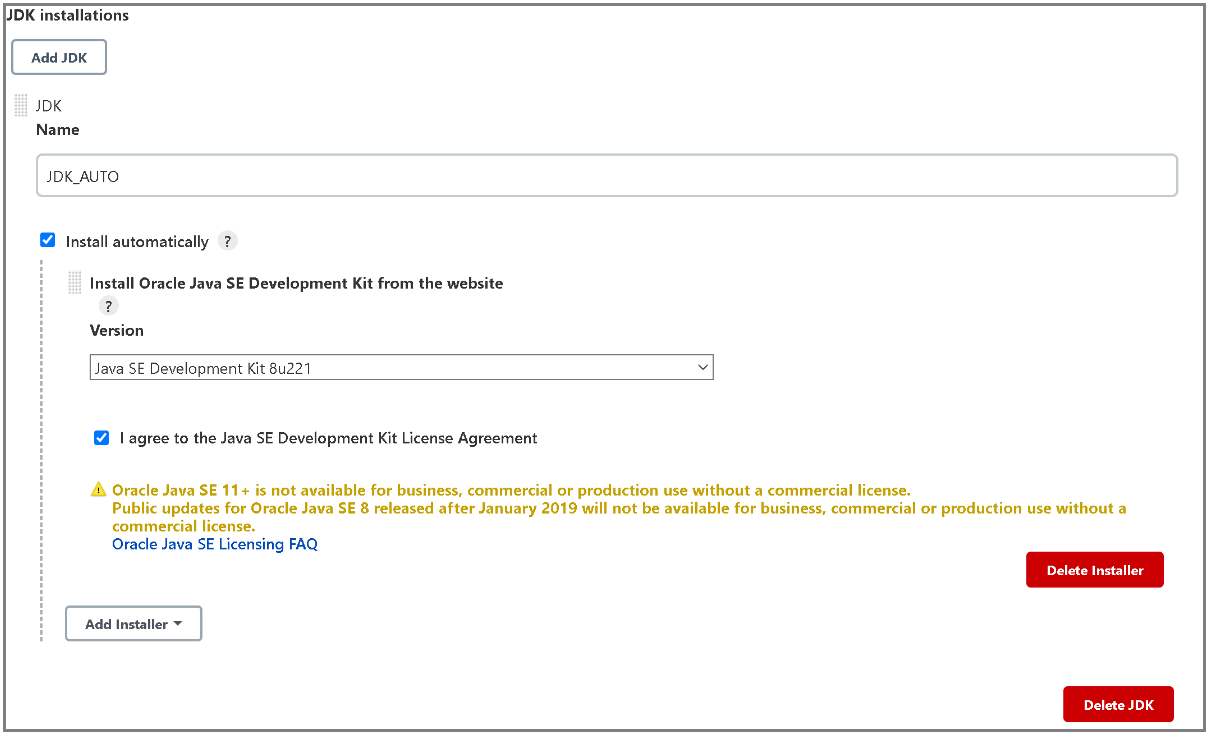
Above: Snapshot of JDK Configuration.
4. ANT Configuration.
Recommended version: 1.10.X ANT Plugin GitHub
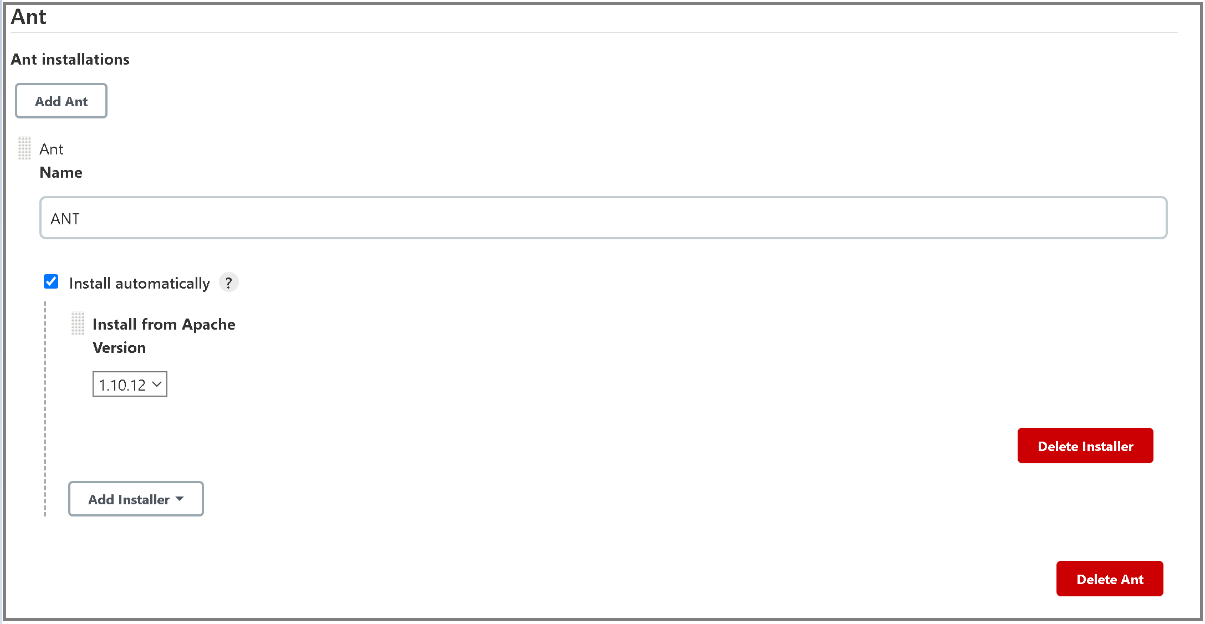
Above: Snapshot of ANT Configuration
5. XVFB Configuration
You cannot install XVFB automatically without a valid URL XVFB Plugin GitHub
Linux Distribution Specific Installations (may require sudo override)

Above: Snapshot of XVFB Configuration.
Step 7: Build Environment.
Select With Provar Automation.
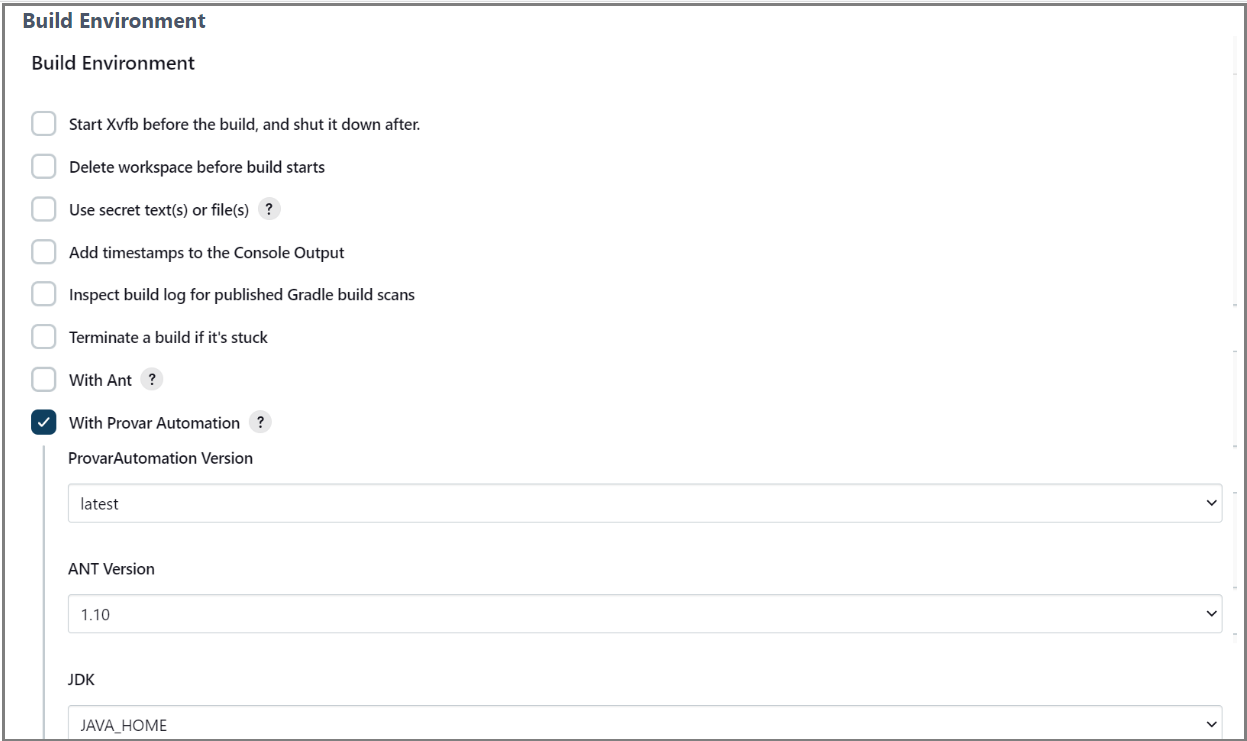
Above: Snapshot of Build Environment.
Step 8: Build step configuration.
Please follow the build steps:
- Provar Version: Provar Installation to use. The version you select here will be used for the task itself.
- Project Name: The project folder containing the Provar test project. Leave blank if any of your root repositories contains the .testproject file. The project path must be relative to the Jenkins workspace directory.
- Build File: Build file to use. The plugin will look for build.xml in the ANT directory if left blank. Otherwise, look for the named build file in the ANT directory of the Project Name folder.
- Test Plan: Test Plan to use. Plugin will look in the plans directory of the Provar Project folder for the named Test Plan. Full relative paths can be used (i.e. Regression/Sales Cloud/Account)
- Test Folder: The Test Folder to include in the test run. Plugin will look in the tests directory of the Provar Automation Project for the folder. Full relative paths can be used (i.e. Regression/Sales Cloud/Opportunity)
- Test Folder: The Test Folder to include in the test run. Plugin will look in the tests directory of the Provar Automation Project for the folder. Full relative paths can be used (i.e. Regression/Sales Cloud/Opportunity)

Above: Snapshot of Build steps.
Step 9: Environment settings.
The test environment can be left blank for the default environment.
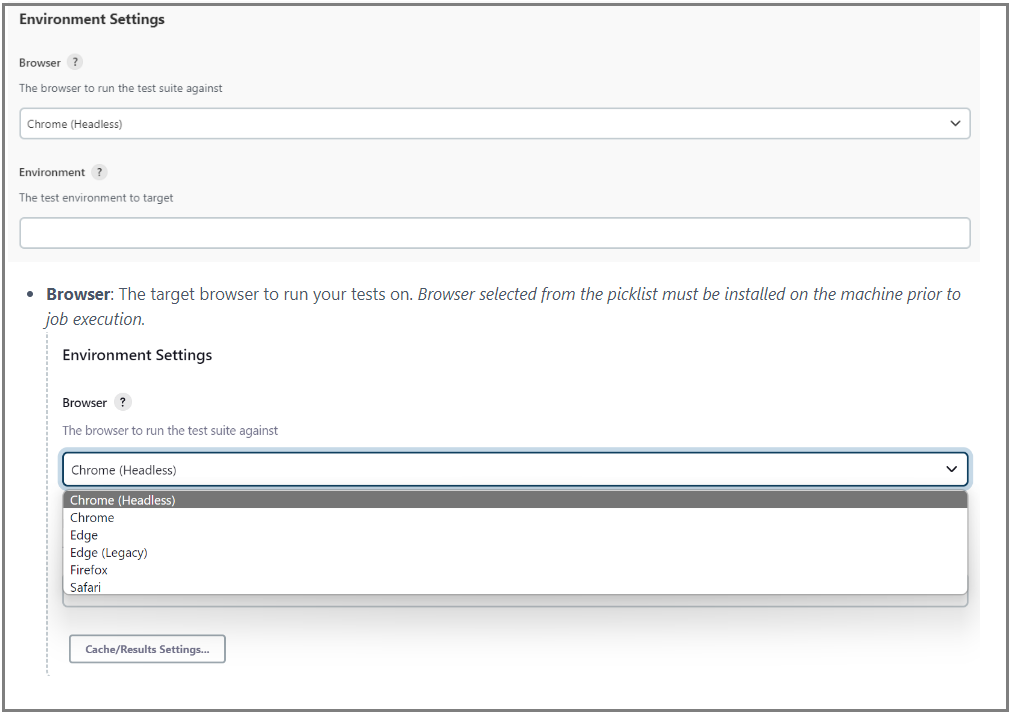
Above: Snapshot of Environment settings.
Step 10: Cache settings.
a.) Salesforce Metadata Cache Setting: The cache setting to use when accessing Salesforce Metadata.
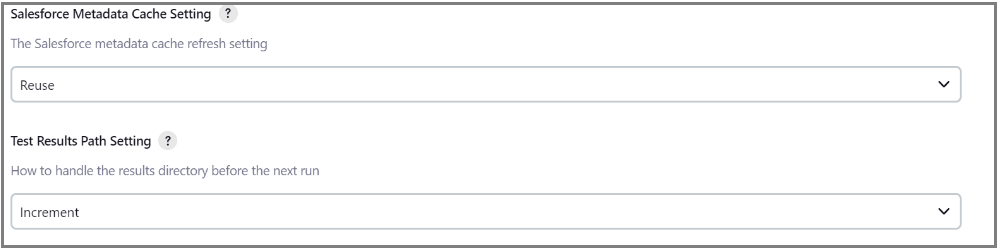
Above: Snapshot of Salesforce Metadata cache setting.
b.) Test Results Path Setting: How will the ANT/Results folder be handled in subsequent job executions?

Above: Snapshot of Test Results Path Setting.
Build.xml Configuration
Below is an example with some values called out for your attention.
<project default="runtests">
	<property environment="env"/>
	<property name="provar.home" value="${env.PROVAR_HOME}"/>
	<property name="testproject.home" value="${env.PROJECT_WORKSPACE}"/>
	<property name="testproject.results" value="${testproject.home}/ANT/Results"/>
	<property name="secrets.password" value="${ProvarSecretsPassword}"/>

	<taskdef name="Provar-Compile" classname="com.provar.testrunner.ant.CompileTask" classpath="${provar.home}/ant/ant-provar.jar"/>
	<taskdef name="Run-Test-Case" classname="com.provar.testrunner.ant.RunnerTask" classpath="${provar.home}/ant/ant-provar.jar;${provar.home}/ant/ant-provar-bundled.jar;${provar.home}/ant/ant-provar-sf.jar"/>

	<target name="runtests">

		<Provar-Compile provarHome="${provar.home}" projectPath="${testproject.home}"/>

		<Run-Test-Case provarHome="${provar.home}"
				projectPath="${testproject.home}"
				resultsPath="${testproject.results}"
				resultsPathDisposition="${env.RESULTS_PATH_SETTING}"
				testEnvironment="${env.ENVIRONMENT}"
				webBrowser="${env.BROWSER}"
				webBrowserConfiguration="Full Screen"
				webBrowserProviderName="Desktop"
				webBrowserDeviceName="Full Screen"
				salesforceMetadataCache="${env.CACHE_SETTING}"
				projectCachePath="${testproject.home}/.provarCaches"
				testOutputlevel="${env.LOGGING_LEVEL}"
				pluginOutputlevel="WARNING"
				stopTestRunOnError="false"
				secretsPassword="${secrets.password}"
		>
			<fileset dir="${testproject.home}/tests/${env.TEST_FOLDER}"/>

		</Run-Test-Case>

	</target>

</project>
For more information, check out this course on University of Provar.