App Configuration for Microsoft Connection in MS Portal for OAuth 2.0
This support article provides instructions for configuring the Application and its permissions required to create connection in Provar for MS Exchange and MS Graph Connection types.
Until now, Provar had been using basic authentication for Microsoft Exchange Web Service (EWS). Provar users can now access Microsoft Emails using OAuth 2.0 using Microsoft (EWS) and MS Graph by creating a new connection or updating an existing connection. And you can use Send and Subscribe Test APIs with Microsoft Connection for emails.
Provar Application registration in Azure Active Directory (AD)
To register an application in Azure AD:
- Log into aad.portal.azure.com with the appropriate admin account.
- Click Azure Active Directory in the menu.
- Under the Manage section, click App Registrations.

- Click New Registration.
- In the Name field, enter a name to register the new application.
- Set Supported account types as appropriate.

- Click Register.
The Provar Application is registered.
Configure permissions in Azure Active Directory
To configure permissions in the Azure Active Directory:
1. In App registrations, select the application registered in the previous section.
2. Under Manage, click API Permissions.
3. Click Add a permission.
4. Under my organization’s APIs, type “office” in the search box and select Office 365 Exchange Online.
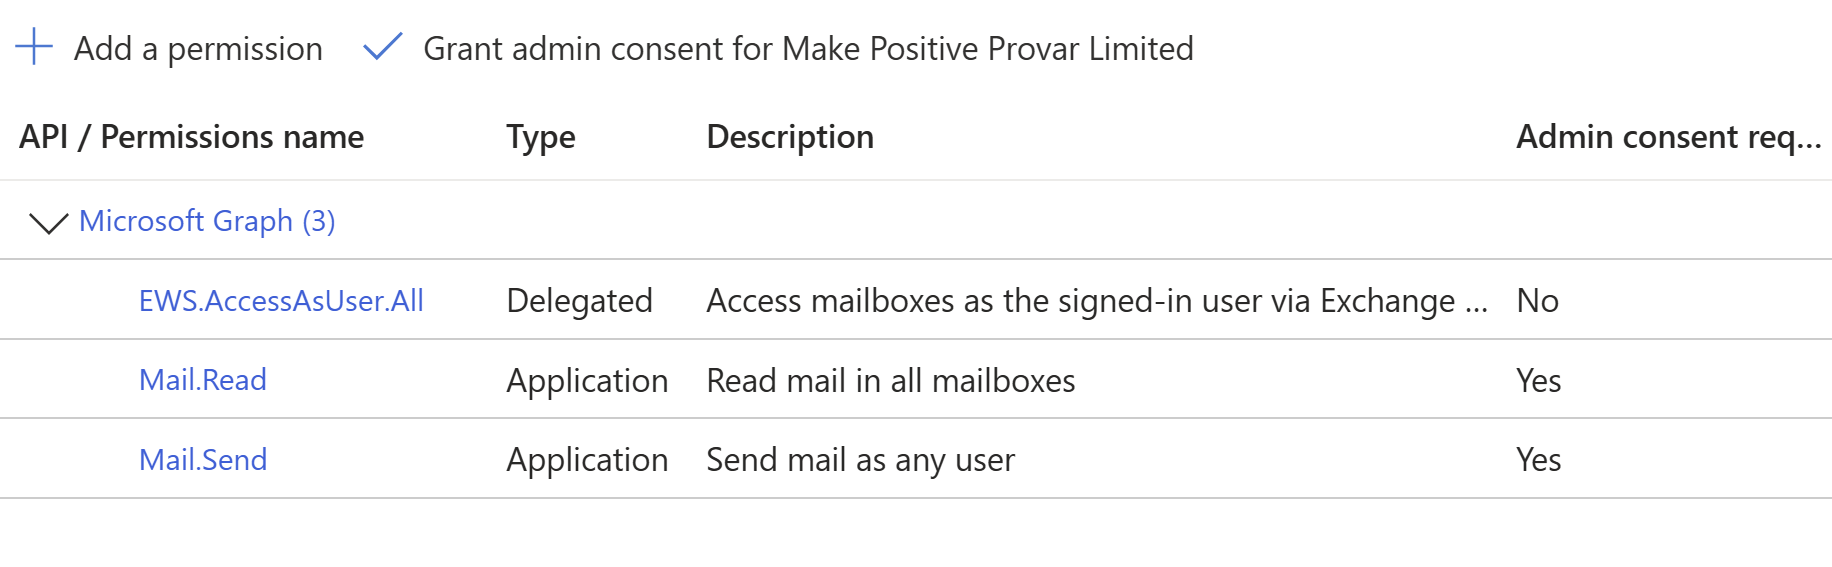
5a. If you are using EWS Exchange Web Service, then use these permissions.
You need to add a delegated EWS.AccessAsUser.All permission and Mail.Read and Mail.Send as Application Type permission.


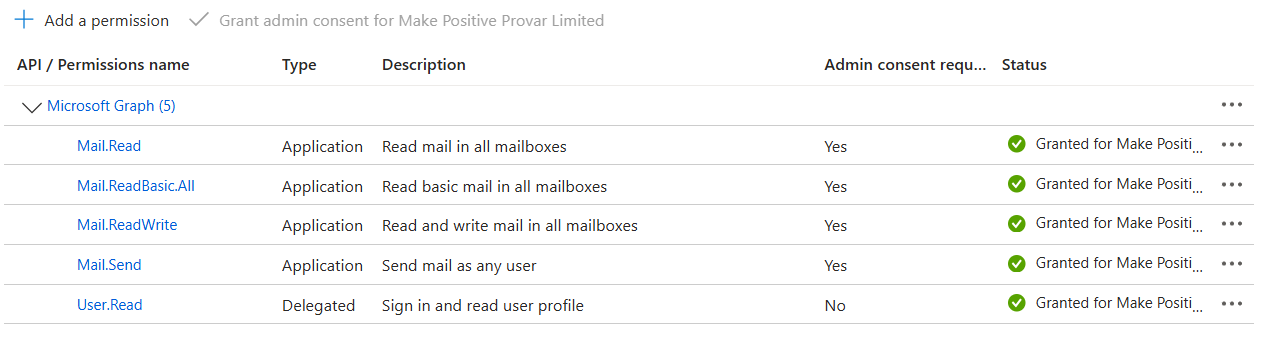
5b. If you are using MS Graph, then use these permissions.
All permissions should be Application type permissions.
6. Click Done.
7. Under Grant Consent, select Grant admin consent for (your domain here).
8. Select Yes. The permissions are displayed in a list.
9. Under Manage, click Certificates & secrets.
10. Select New Client Secret. In the Expire field, select an appropriate expiration duration. Click Save.

11. A value is displayed. Copy this value and make a note since this is the only time this value is displayed.
12. From the Overview section, copy the Application ID and Tenant ID to add to the EWS configuration.

13. To get the Redirect URI, click on Add a Redirect URI, as shown in the above screenshot.
14. Click Add a Platform.
15. Select Web from the Web Application section.
16. Enter the Redirect URI e.g. https://oauth.pstmn.io/v1/browser-callback
18. Click Configure. The screenshot given below shows the Redirect URI.
