Importing 3rd-Party Test Projects
Quality Hub is built on the Salesforce platform, meaning any tool used to perform ETL (extract, transform, load) tasks on Salesforce can also be used for Quality Hub.
Data Import Tools
Here are some of the most popular ETL tools for Salesforce:
- Salesforce Data Loader is a free client application for the bulk import/export data. Can be used to insert, update, delete, or export Salesforce records.
- Dataloader.io is a popular cloud data loader for Salesforce that lets you quickly and securely import, export, and delete unlimited amounts of data.
- Jitterbit Salesforce Data Loader is a cloud data loader that quickly and easily automates the import and export of Salesforce data.
- Dataimporter.io is a cloud data loading tool that lets you connect, clean, and import data into Salesforce.
Importing Test Cases
When migrating from a test management application to Provar Manager, it is important to know how to import your existing test cases with their test steps.
In this section we use Salesforce Data Loader, but you may want to use a different tool.
Step 1: Store your test cases in a CSV file
The CSV file should only contain test cases, not test steps. Depending on the information you have about your test cases, you may want to add more or less headers to the CSV file, but the following are required:
- Test Case Name (80 characters max)
- Test Type (must be one of the available ones in Provar Manager)
- Status (must be one of the available ones in Provar Manager)
- Test Project ID (not strictly required but highly recommended)

Step 2: Import the test cases
Once the CSV is ready, follow these steps to import it into Provar Manager:
- Open Salesforce Data Loader.
- Click the Insert option.
- Log into the Salesforce org where Provar Manager is located.
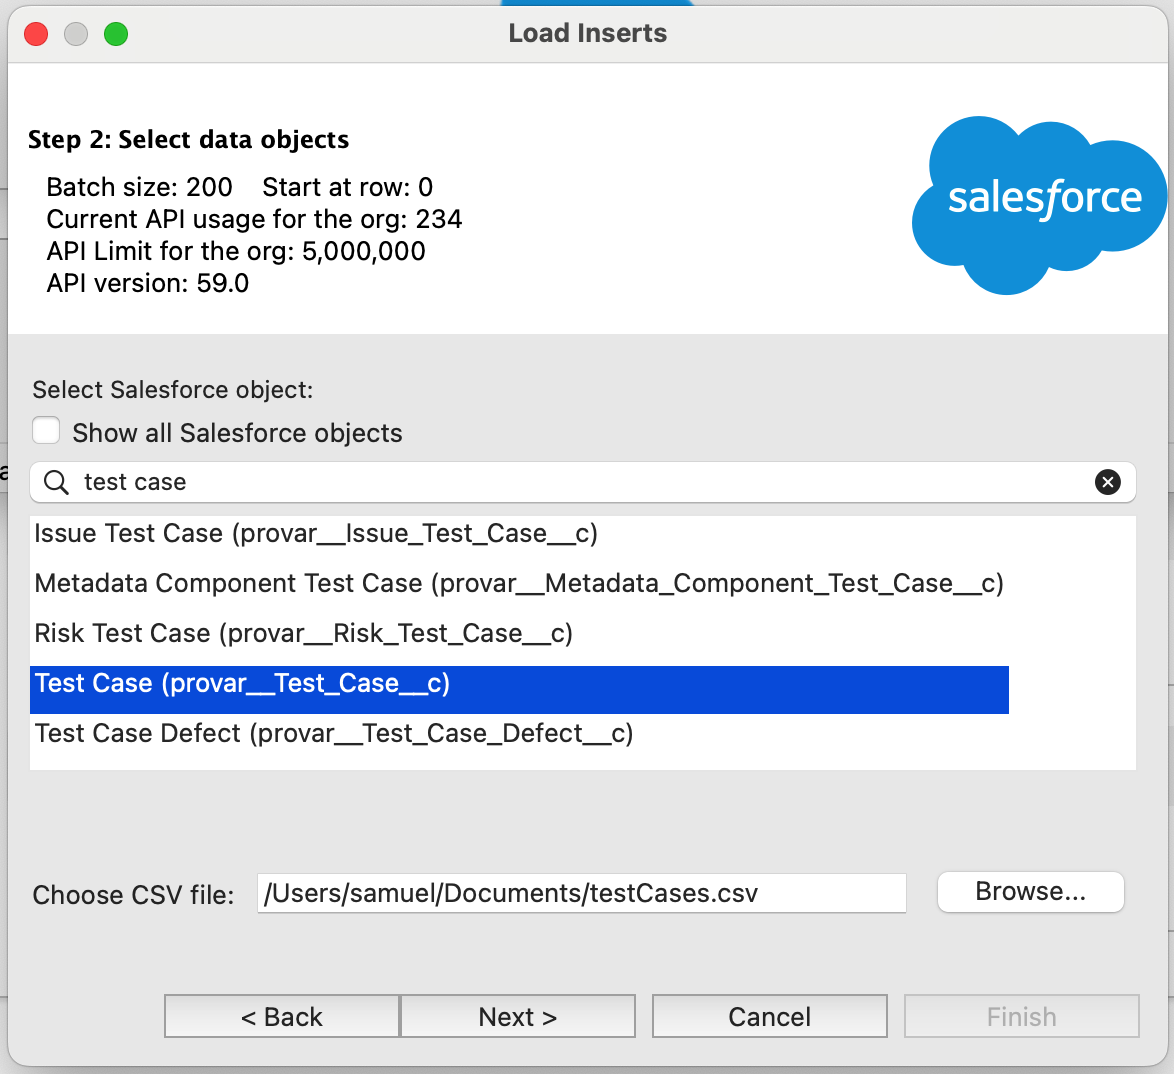
- Search for and select the Test Case (provar__Test_Case__c) Salesforce object.
- Choose the CSV file and click Next.
- Ignore the next screen and click Next.
- Click on Create or Edit a Map.
- Search for the test case fields and map them to your CSV file headers by dragging and dropping them.
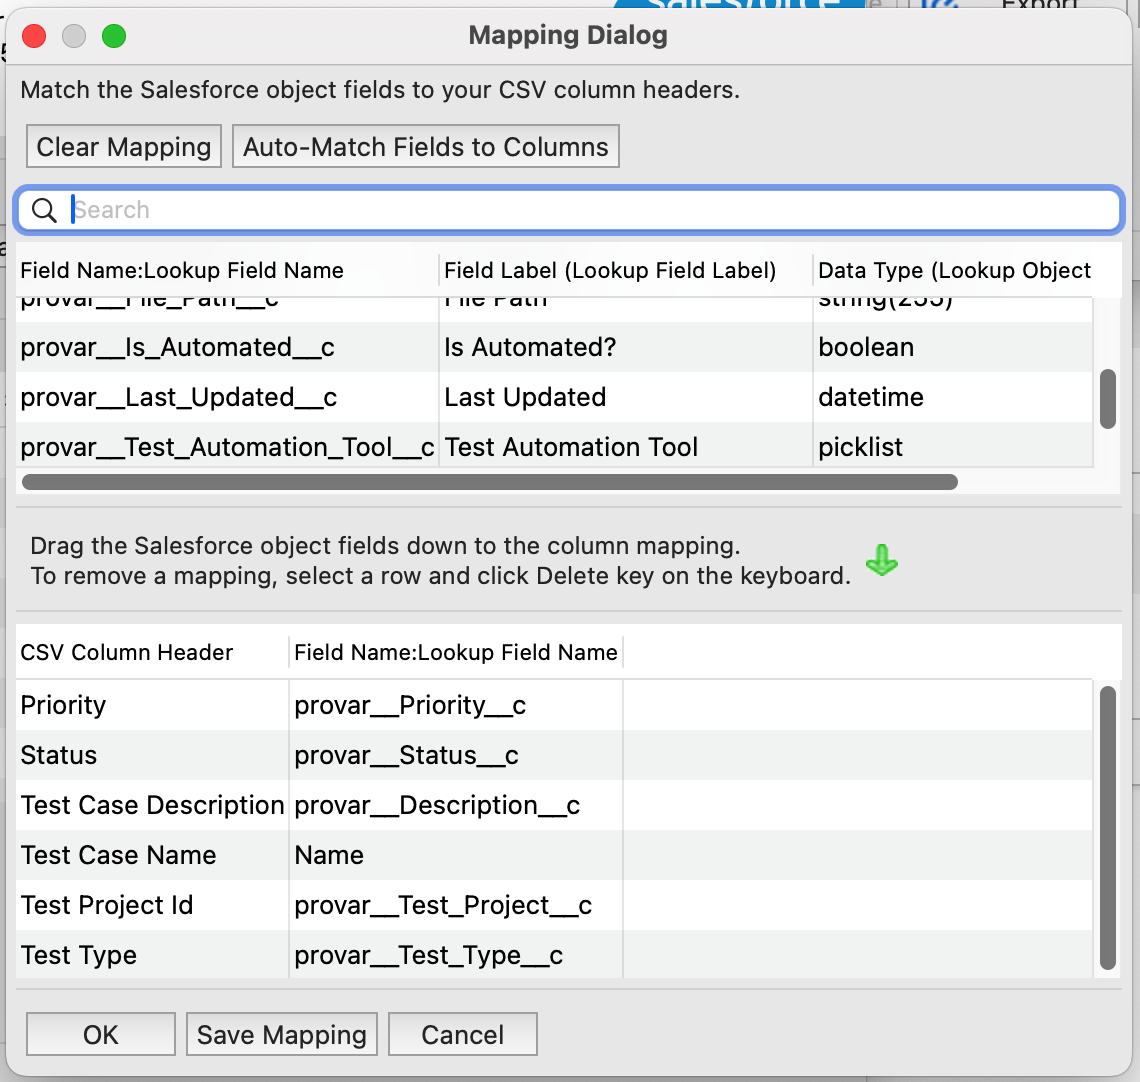
- Click OK when you are done.
- Click Next.
- Select a folder to store the results. You will need the results file afterward.
- Click Finish and select Yes in the final prompt.

- Review the results and click OK.
Step 3: Import the test steps
Now that the test cases have been imported, it’s time to import their test steps by following the same approach as before but choosing the Test Step (provar__Test_Step__c) Salesforce object instead.
The following headers are required:
- Test Case Id can be found in CSV’s results when importing test cases.
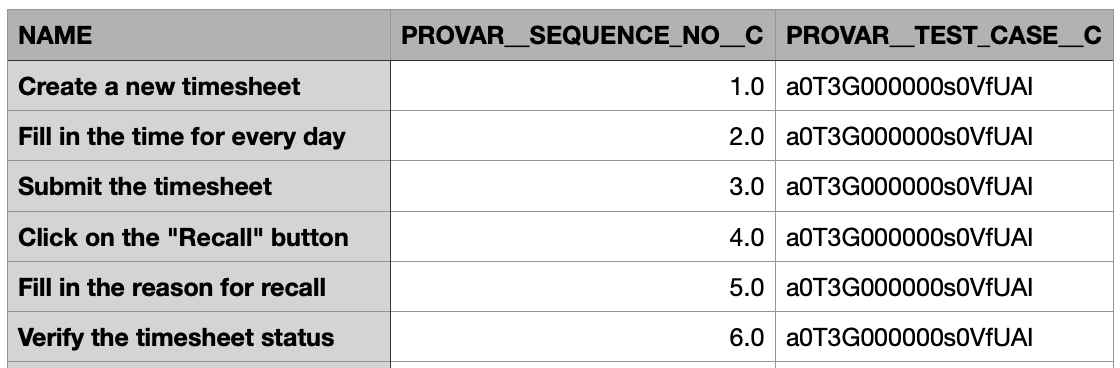
- Action (Short) is limited to 80 characters. We recommend entering the full test step action in the Action (Long) field and entering the truncated version in Action (Short).
- Sequence No defines the order in which test steps should be executed (e.g., 1, 2, 3, etc…)
Importing Test Suites
Test Suites are a great way of grouping and categorizing test cases. In Provar Manager, a test suite can have many test cases, and a test case can be part of many test suites.
Follow these steps to import your test suites and then relate test cases to them.
Step 1: Store your test cases in a CSV file
The CSV file should only contain test suites, not test cases. The following headers are required:
- Test Suite Name (80 characters max)
- Test Project ID (not strictly required but highly recommended)

Step 2: Import the test suites
Once the CSV is ready, follow these steps to import it into Provar Manager:
- Open Salesforce Data Loader.
- Click the Insert option.
- Log into the Salesforce org where Provar Manager is located.
- Search for and select the Test Suite (provar__Test_Suite__c) Salesforce object.
- Choose the CSV file and click Next.

- Ignore the next screen and click Next.
- Click on Create or Edit a Map.
- Search for the test case fields and map them to your CSV file headers by dragging and dropping them.
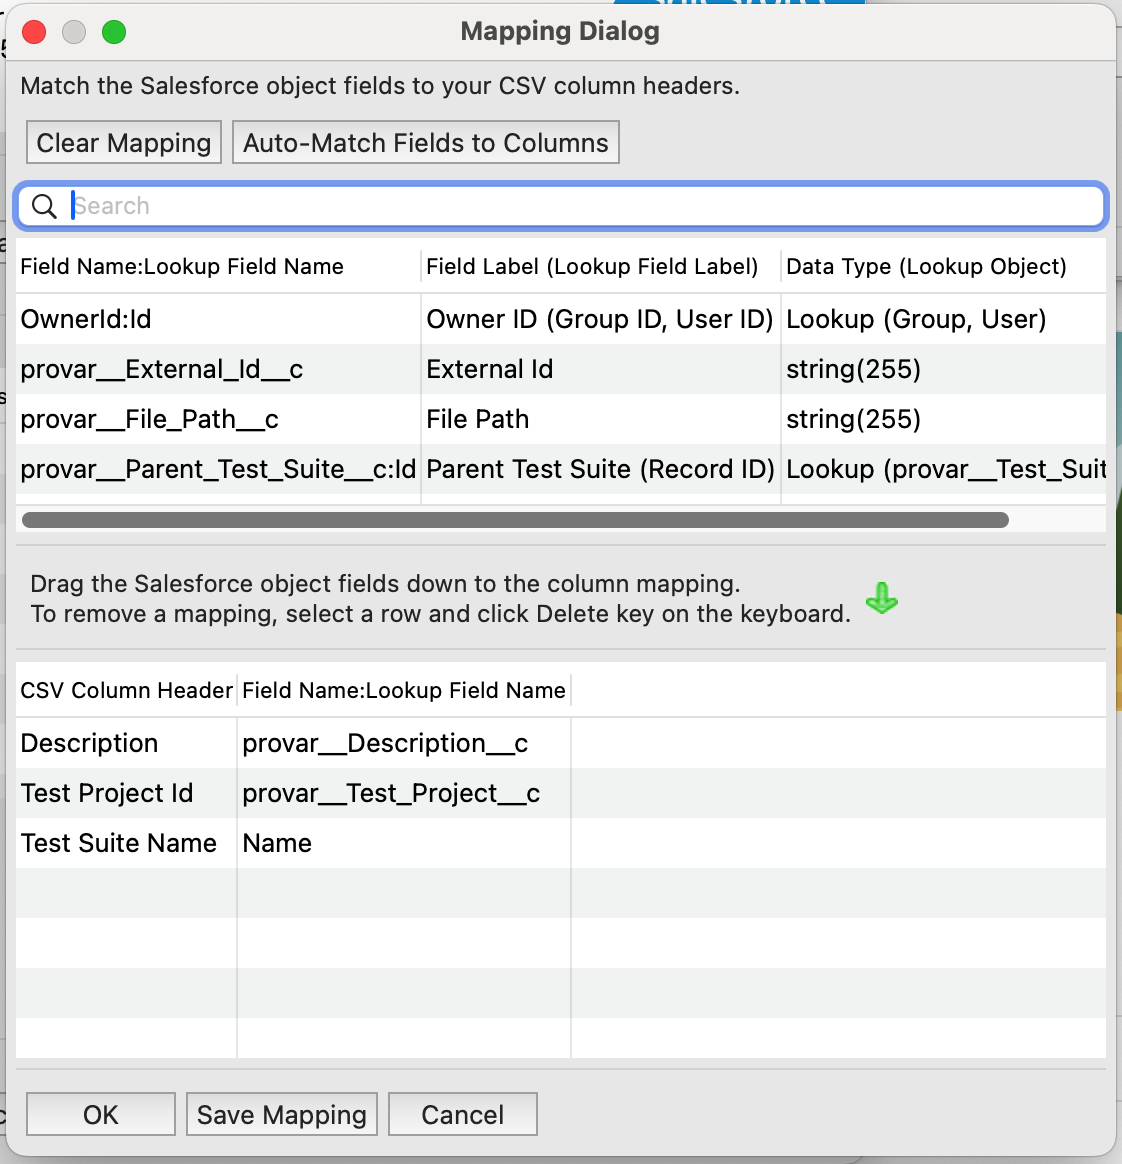
- Click OK when you are done.
- Click Next.
- Select a folder to store the results. You will need the results file afterward.
- Click Finish and select Yes in the final prompt.
- Review the results and click OK.
Step 3: Relate test cases to their test suites
Now that the test suites have been imported, it’s time to relate the existing test cases to their test suites following the same approach as before, but choosing the Test Suite Case (provar__Test_Suite_Case__c) Salesforce object instead.
These are the required headers in the CSV file:
- Test Case Id. You can use Dataloader to export existing test cases with their IDs.
- Test Suite Id. You can find this ID in the results CSV created when importing test suites.
For more information, check out this course on University of Provar.