Quality Hub Version Control Setup
You can use Quality Hub to represent your version control systems, repositories, and branches, which you can later use to orchestrate test executions with tools like Provar Grid.
To define a new VCS, open the VCS tab, click the New button, enter a name, select the appropriate platform (e.g., GitHub), and click Save.
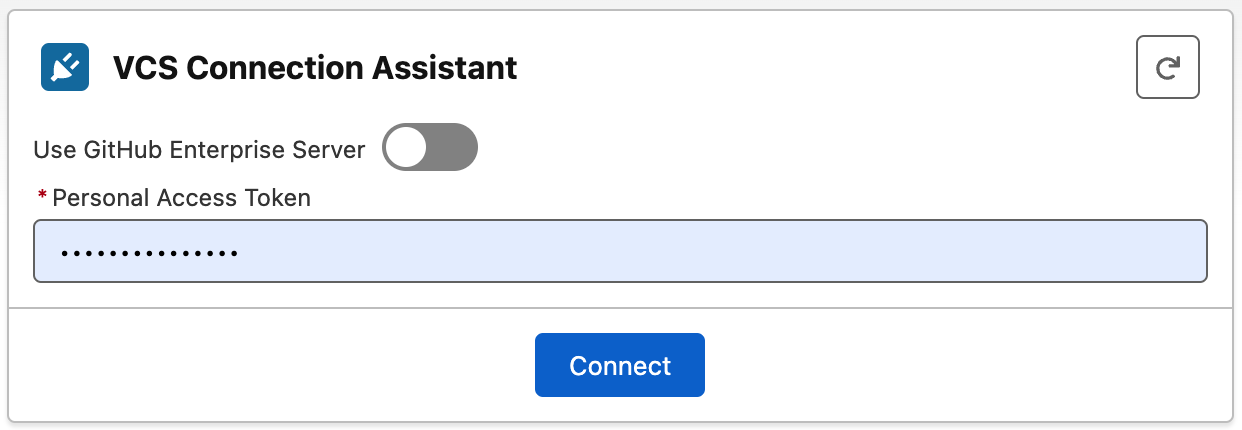
The next step is to connect to the VCS by using the VCS Connection Assistant on the right side of the record page.
Depending on the platform selected, the assistant will ask for the appropriate information to establish a connection.
Once you have entered the required information, click the Connect button.
After establishing the connection, you can import Repositories by clicking the Import option on the related list.

A new tab will appear where you can view, search, and select the repositories you want to import.
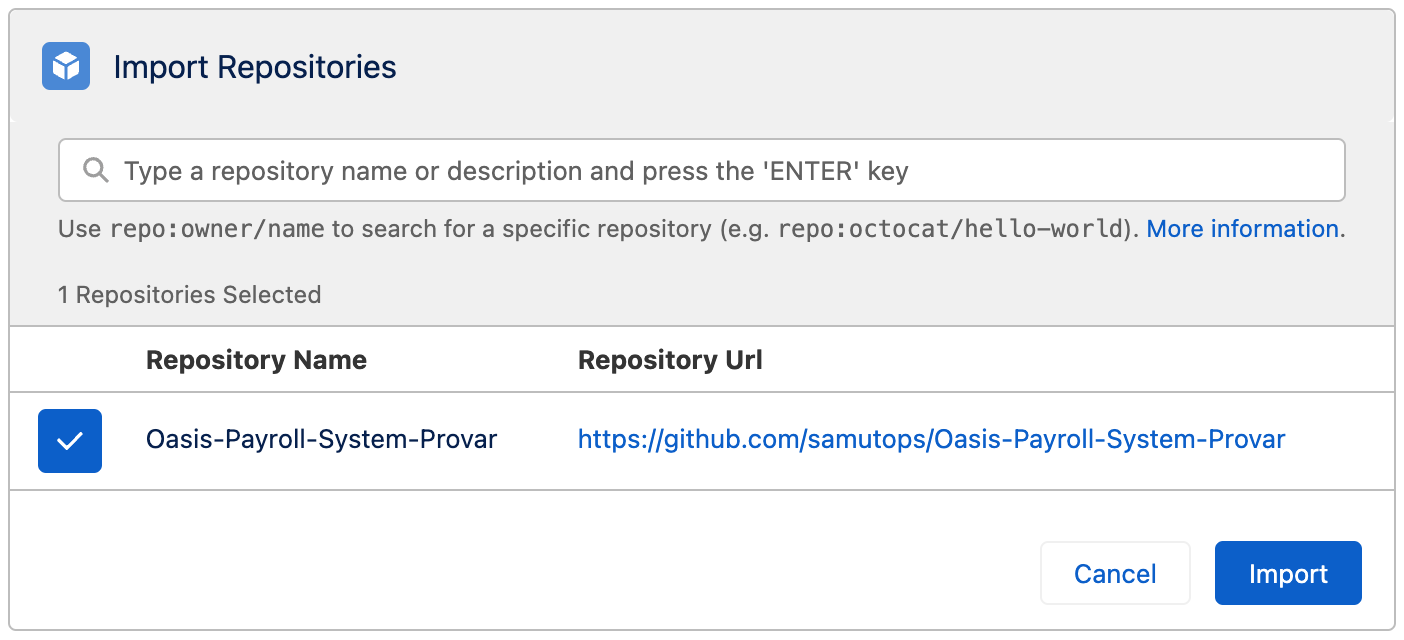
After importing the repositories, you will find them under the VCS record.
You can now import its branches from the repository record and relate them to your existing environments by clicking the Import option on the related list.

A new tab will appear where you can view, select, and choose which environment to import each branch under because branches are a type of System record.

After importing the branches, you can see these under the Repository record.